

Friday, December 10, 2010
Reindeer Cupcakes
Monday, November 29, 2010
Thanksgiving
A Holiday Full Of
Food


Friends, Family and Fun


Traditions


And no matter how you try to hide it…
Family


***I need to take more photos next year. Better photos. Alas. We had this lovely event at my wonderful in-laws house. Thank you Gary and Susan for all the hard work! What a wonderful day!***
Thursday, November 25, 2010
Apple Butter

Here are the ingredients straight from the book.
15 minutes or less to prep—Awesome!
Overnight Apple Butter
1 cup firmly packed brown butter
1/2 cup honey
1/4 apple cider
1 tablespoon ground cinnamon
1/4 teaspoon ground cloves
1/8 teaspoon ground mace
10 medium apples, peeled cored and cut into large chunks
The book recommends a variety of apples to create a “complex” flavor but I just used a bunch that I got from Costco on super sale and I had all the other ingredients on hand. I take that back-I had to buy the mace—which why the heck did I do that when I only needed an 1/8 of a teaspoon?! Oh well.
You put everything into the crock pot on low and let it cook down for 10 hours. I did this overnight and when I woke up the house smelled so good. Then, since I didn’t have a Foley mill, (sad face) I put the metal sieve over the top of the crock pot and took the apples out a bit at a time and mushed them through with the back of the spoon. It worked. A bit time consuming but it worked. When this step is complete crank the Crockpot up to high and leave apples in an extra hour so the apple butter thickens up. Next take out of cooker and put in a bowl in the fridge. I have now put the butter into little mason jars and are ready to hand out a few as gifts. Spread it on toast in the morning…mmmmmm. So good.
del.icio.us Tags: apple butter,magillie,southern living,foley mill,fall,autumn,gift,gift ideas,cheap,slow cooker
Friday, November 19, 2010
Feather Bed Rolls
 This wonderful recipe is from my mother-in-law. She got it from her mother-whom I think got it from a neighbor. At any rate, I love these sticky delights they call “Feather Bed Rolls”. I can truly eat them until I feel sick.
 I have had this recipe for quite sometime but found it daunting to make them when my MIL can make them perfectly. I plucked up the courage and baked some for a Mops meeting the other day. And they were eaten up! I was so proud of myself—too bad I brought breakfast the wrong week. Typical me. Since they were a hit I thought I would post the recipe. So hear you go…Enjoy!
Ingredients/Directions
1 cup shortening—plus a little
2 tsp. salt
3/4 cup sugar
3 eggs (well beaten)
1 cup boiling water
2 cakes or packages of yeast
7 cups bread flour
1 cup lukewarm water
Mix the sugar and shortening till well blended. Add boiling water and let cool. Add well beaten eggs and yeast which has been dissolved in the lukewarm water. Add flour and salt and place in a well greased bowl and cover. Let rise for at least 2 hours. Shape into rolls and let rise again.
Now if you are like me, this might stress you out, but no worries! Here is how you do the rolling and shaping…
Flour the surface of your counter. Take the dough out of the bowl and onto the counter. Roll out into a rectangle (ish) shape. Brush the dough with butter and then sprinkle the whole thing with sugar and cinnamon. My mother-in-law uses brown sugar. I goofed and used white but I didn’t get any complaints. Next roll up into a long log type shape and slice into circles. Make these more thin than thick.
Now how to cook these up--wait first we have to make the yummy goo!
Butterscotch Topping
1/2 cup brown sugar
1/4 cup butter
Plus one tablespoon light corn syrup
Melt down sugar, butter and corn syrup and and put it in the bottom of an 8x8 pan. For this entire recipe you will need 3 8x8 pans so you can do the above recipe 3x.
If you would like to add nuts, (chopped pecans are nice) now is the time to do it. Arrange rolls on top of goo and nuts and bake for 20 minutes in a 350 degree oven. For all my organized friends—you can do all of this recipe 1 day ahead of time. Do everything but bake it (duh) and cover with saran wrap and put in the fridge-when ready just pop the 8x8 pans in the oven (minus the saran wrap) and bake up! Mmmmm your house will smell so good! Have fun making these delicious delights and try not to eat them till you feel you are going to pop. Good luck and I would love to hear if your family loves them too!
Tuesday, November 16, 2010
Birthdays sending you to the Poor House?

One afternoon I was flipping through the Land of Nod catalogue I came across this bin of goodies. Eureka! The answer to my problem. Am I going to buy this?—heck no! I am going to steal the idea and get all my goodies at the dollar store. Holla! I can put together this little ditty cheaper and minus the shipping and handling fee. I packed the colorful container with craft sticks, google eyes, beads, stickers, markers, construction paper, glue, glitter, tape and spangles. The list goes on and on. I spent $50 and some odd change. Divide that by 3 (which is the number of kids birthdays for November)and you have spent roughly $17 a package! Awesome!!
Here are a few extra ideas you could add in for some more fun but will run up the overall cost of the gift.
A copy of Harold and the Purple Crayon or a book from Eric Carle would be a great addition.
I love the idea of a big roll of craft paper or the non coloring book. (I am still searching for a link to this one).
Include a good craft, how to or rainy day activity book for kids.
Or you could print a variety of free or low cost images from the web.
Robert Sabuda has a great site and links to making your own pop up cards.
This etsy seller has cute pdf files for sale too. So drop some card stock in your printer and include a little extra something in your art boredom buster art kit.

Thursday, November 11, 2010
Soccer Ball Cupcakes


Wouldn’t you play soccer if you get delicious cupcakes like this? They were deeee-lish-ous and made by a wonderful mom on Lillie’s team who should really go in the business! She made it all sound so easy breezy but this would take me forever! What I do remember is that they were originally a box mix (A BOX MIX??? wha???) with some razzle dazzle of crushed up Oreos and and sour cream. And to make the Oreo look like a soccer ball-marshmallow fondant! We all know fondant looks pretty but it tastes well…I will leave that one for you to fill in. But marshmallow fondant = good and pretty. And yes that is an Oreo cookie on the bottom of this perfect cupcake. I have to quit talking about this cause it just makes me want another one to eat.
Cupcakes aside –how was the soccer season you might ask. Well, Lillie has graduated from picking daisy flowers to watching her shadow and chasing butterflies. On a good day, she would run with the pack. When I was pregnant with Lil, we had a friend joke that we were hatching the perfect German athlete. Hmmmm. Time will tell on that statement but we do have the perfect little girl(spoken like a true mother). One who worried when others were knocked over, was over dramatic when she was knocked over, who hugs her coaches and teammates and who still waves to me when on the field. I will take it.

Wednesday, November 3, 2010
Jewelry Tutorials
I had the honor of being asked to do a craft demonstration at my local MOPs meeting. On the agenda are three easy earring designs.We will create a dangle, a stacked and a joined earring. Make sure you have your pliers, wire, findings and come join in the fun cause I have made some video tutorials!
Eeeep! Video tutorials? I mean it seems a natural step. Everyday for 10 years I got in front of a classroom of kids. The most visited blog post of mine is Lil’s Barbie Birthday Cake (don’t quite know how to take that one).
So I had Jake create an impromptu mini tripod that he could man while I create these little demonstrations. Did I mention I have a very patient husband? Well, whilst creating the videos I became overly aware of every rustle , creak, and pause in my diatribe. When I went back and watched… oh. my. goodness. I could be the next movie feature for mystery science theatre. Especially when I bug out my eyes! Me: “Lets Begin!” Set Directions: Bug out eyes like crazy person.
Oh well. For better or worse I am going to post. Humility is a good thing. If you stick with my blog and I do more “helpful” tutorials, I will strive to at least keep my hands on the screen.
PS— High Def-you are a cruel, cruel mistress.


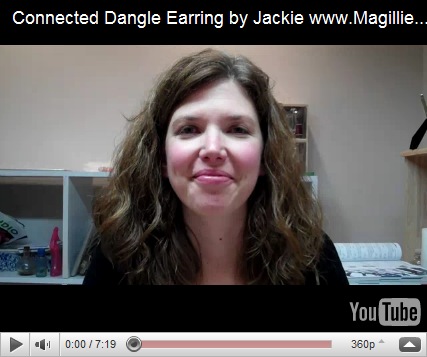
del.icio.us Tags: jewelry,jewelry tutorial,demonstration,mystery science theatre,MOPs,earrings,Magillie
Friday, October 29, 2010
Fall Fairies


 Pink and Green Mama to the rescue again! I had my nieces coming over for a visit and pulled this idea from her fabulous repertoire! It is so simple—try it out! I betcha have the supplies at home already! All you need are:
- pipe cleaner
- wooden beads
- sharpie markers
- faux flowers/leaves
- pony beads
Fold one piece of pipe cleaner in half-cut another in half and wrap around to make arms. Make sure to do arms after the head is in place.
Fold hair inside the loop of large pipe cleaner and pull wooden bead up to make the head
Sharpie away a face on your fab fall fairy
Add 3 ponly beads—2 is the shirt and 1 are the undies
Add the flower skirt and form hands and feet-tah dah!! A lovely fall fairy!
Happy Crafting!
Tuesday, October 26, 2010
Leaf Bowl
I found this charming project from a lovely blog…and now I can’t find the link to show some love! Oh dear! This idea is not mine and if I can find the source I will add it in this entry.
If you would like to make your own leaf bowl the steps are simple.
- Go on a nature hunt and find some colorful leaves.
- Put the leaves under some heavy books and allow to flatten overnight. This was a time consuming nuisance for my Goose who “wants to do the project”!
- Get a glass bowl. I tried to score one at the dollar store but struck out. Bummer. You can pick one up at Michaels but be sure to take your 50% off coupon. If you still have to make your candy corn wreath…take a coupon for the Styrofoam too. Who knew…Styrofoam is expensive!
- Cover the entire bowl in Mod-Podge—gotta love the Mod-Podge. ***Note*** If you have never used the Podge before you will love it. Make sure to really wash out your brushes post project or it is nearly impossible to bring them back to life when the Podge dries in the bristles. I had to learn this the hard way.
- Apply the leaves. I let Lil do this step. Which, truth be told, was a little hard cause I wanted to fill all the space and make it look more symmetrical but alas that would have spoiled the fun.
- Once the leaves are on, coat them with Mod-Podge and allow the entire bowl to dry over night. We kept our bowl outside since Mod-Podge has a “funny” odor according to my little one.
- Place a tea light inside and voila!! It is a delightful centerpiece inside or outside.
Here are the pictures of our leaf bowl project. This always helps me…I am a visual learner.


del.icio.us Tags: leaf bowl,fall project,how to make a leaf bowl,Michaels,Mod Podge,Magillie,centerpiece
Have fun and if any of you web crawlers can find the blog that did this-- send me the link. xo!!
Sunday, October 24, 2010
Cows n Corn
You know you live in the country when…
Okay really this is a sweet story and so typical of me. Lillie’s first little field trip for her preschool St. Stephen’s and I am lost. Shocker. Yes, even with my GPS. I am going to go down in history as the Worlds Worst Mom cause we are about to miss the hayride with all of her classmates. Oh Geez. I can see the big silo painted like an ear of corn and I am circling and circling—where do I enter this farm? Where are all of the other moms parked? Panic is setting in. Full speed ahead I pull into the local post office. I go in and sputter out my story-and how about we are about to miss the hayride. Help! A very sweet customer adorned in her fight for breast cancer t-shirt ( I heart her already) says “awww honey –you just bout there” and she proceeds to give me the 2 step directions to a place where I could pretty much walk. Sadly, I can’t hear it-I am in full panicky mode. She must see it- “awww honey lemme just take you there-it is on my way” I love her. Lillie talked and talked forever about how nice it was of her to help us. And kind stranger if you ever read this post-we made the hayride. Thank you so much!! xoxo
If you need a fun fall activity to do—I highly recommend cows-n-corn. This is a Dairy Farm that makes the time during the fall season to take kids on hay rides, teach them a bit about the dairy industry and have them make and taste homemade butter and ice cream! Best of all they can run around on the beautiful farm land and work their way through a the corn maze. A new fall tradition for this family!


Tuesday, October 19, 2010
A Giveaway…
In a shameless display of self promotion, a few of my blogging friends have generously offered to host a giveaway of my Magillie jewelry. I would love if you would if you would stop by their blogs and enter for a chance to win. Come on. A new bobble to wear!! Or a great gift (if I do say so myself-heh heh heh) for you to give this up coming holiday season. It is a win win situation.
Elizabeth runs a very funny blog : http://halfbaked-twiceasgood.com/ You will quickly fall in love with her snark – cleverly wrapped up with some sweet, southern charm. Don’t get me wrong though…girl can still curse like a sailor! Which admittedly, I love since I am stuck in the land of “Oh Pickles”.
Jennifer runs the blog: http://boogaboojones.typepad.com/signposts/ This former editor now passes the time chasing after two little ones and personifying signs gone awry. You will laugh yourself to tears with the mistakes on signage found all around the U.S. She could probably keep herself busy with my blog too! Seriously!
But all that aside check out these two blogs, they are great! And enter the giveaways! Come on—whatcha waiting for?
Sunday, October 17, 2010
Candy Buttons


Fall…at last. I love the crisp, clean feel of the weather outside. I love the colors and the changing leaves but mostly I love the impending holiday of HALLOWEEN! Decorations are starting to come out in our house and Jake and I are planning how we can make it spooky. The other day Lillie Magillie and I made homemade candy buttons! Rachael Ray had some great, easy candy recipes. Hope we can try out a few more but these were so simple. Fun for little hands to mix the colors and to make the circle shape on paper. Try it out! It is such a cinch. The recipe from the October magazine is here but I will list ingredients and steps as well.
Ingredients:
- 1 1/2 cups confectioners’ sugar
- 1 egg white
- 3 drops yellow food coloring
- 3 drops blue food coloring
Beat with an electric mixer for a few minutes. Separate into two bowls and let little hands add and stir in the color. This is Lil’s favorite part. She loves counting out the drops of food color as they land in the bowl. Using a small zip lock bag add contents and twist up to look like a pastry bag and snip the tip off—you are ready to make buttons. Squeeze out in small circle shapes on long strips of paper and allow to stand and harden overnight. You will have pretty homemade candy the next day—for breakfast if you wish. Just kidding.
I think this would be great at Valentine’s Day gift for a class of kids. Cut pretty heart themed paper into long strips and make all shades of white, reds and pinks. Plus you could even shape the dots like hearts! Roll up and tie with “thread” of licorice lace and slide a short twizzler through as the “needle”. Valentine cards could say corny things like… “I love you sew” or “ You have me in stitches”. Plus the little bit of paper that comes off with this candy when eating counts as fiber and therefore makes them nutritious.
del.icio.us Tags: Candy buttons,homemade candy,Rachael Ray,Halloween,fall,gift,Valentine's Day,diy,Magillie
Friday, October 15, 2010
Candy Corn Wreath

If you want to make this project on your own you will need:
- A styrofoam ring
- glue gun and glue sticks
- black tape
- candy corn (I had 3 bags since a lot in the bags were broken or otherwise imperfect)
Wrap the ring neatly with the black tape, heat up the glue gun and get your piles of good candy corn ready to go. You can lay out ahead and I did but I really think you can just go for the gusto and start gluing. Glue candy corn facing one direction and then the next row face the opposite way. Continue until front and sides are covered. I hung the wreath up with black grosgrain ribbon and voila. It looks great, if I do say so myself. It is perfect for the season. My mom had to be Debbie Downer and tell me how I couldn’t save it due to bugs and mice…still debating if I will keep it or not. I might try out this product, Krylon’s Preserve It!
Wednesday, October 13, 2010
Jumping the Shark
Saturday, October 9, 2010
A Baptism
Why, even the hairs of your head are all numbered. Fear not; you are of more value than many sparrows. Luke 12:7

Sermon link soon to follow.
Subscribe to:
Posts (Atom)

